To access BLUEcloud Cataloging, log into BLUEcloud Central using your preferred browser. Bookmark the BLUEcloud Central URL for future use.
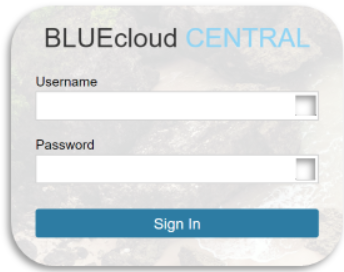
Once the site has loaded, enter your BLUEcloud Central Username and Password. Please note: Your BLUEcloud Central login is not the same as your WorkFlows login.
Username: Contact your ITC's Library Support Staff for this Username.
Your Username is set up by ITC staff and is entered in your WorkFlows patron record under the Privilege tab.
Password: Contact your ITC's Library Support Staff for this password.
Once you have signed in to BLUEcloud, spend a few minutes familiarizing yourself with the available menus.
Institution Context Menu
After you log in, you must select the institution you’ll be working in (your specific building) before you enter Cataloging.
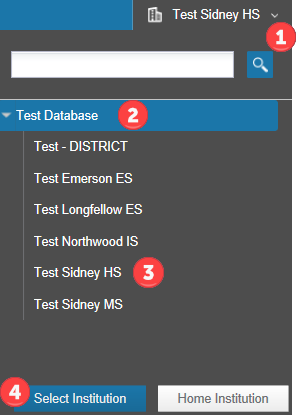
If you’re working in multiple buildings, follow this same process to change the building you are working in. Keep in mind that your district name (#2) groups your buildings together. The district name is not linked to a specific database, so you must choose the building that you’ll be working in. If you don't, you will get an error message when you try to access Cataloging.
Once you have selected your building, you can now enter Cataloging.
Other important menus you should become familiar with are the Home, Staff, Connections, and User menus. Each contain helpful information for using BLUEcloud. See below for more information on each menu.
Home Menu
If you get lost or need to switch between Circulation and Cataloging, use the Home menu to get back to the BLUEcloud Central home screen.
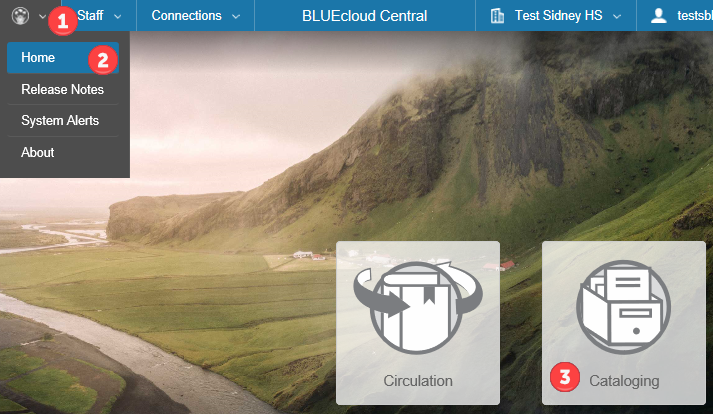
You can also visit About to verify the version of BLUEcloud that you are running. Release Notes and System Alerts are available to those who have a SirsiDynix Support Center account. At this time, those accounts are limited to INFOhio Providers.
Staff Menu
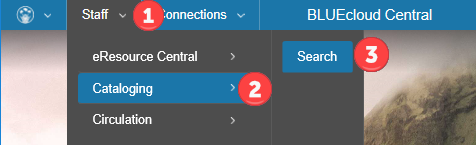
Clicking the Cataloging tile on the home screen will take you to the same Search screen that the Staff drop-down uses.
You can also navigate to Circulation and eResource Central (if that has been setup for you) from the Staff menu.
Connections Menu
The Connections menu allows you to quickly access additional resources or sites that your INFOhio Provider has highlighted for you.
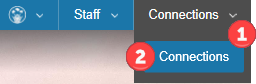
The Connections list of available links will display. The list of links available will vary from district to district.

Select an item from the list and a new window will open. Talk with your INFOhio Provider for any additions or customizations to your list.
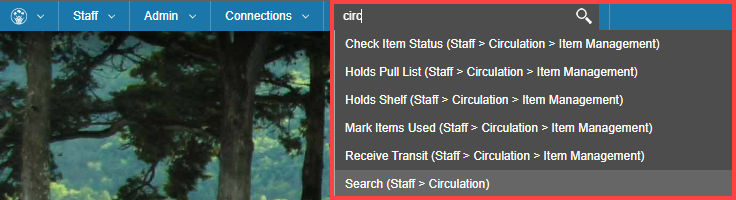
Menu Search
BLUEcloud Central's menu search allows users to search for a page by name instead of navigating through the available menus.
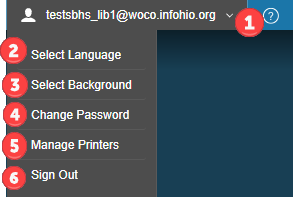
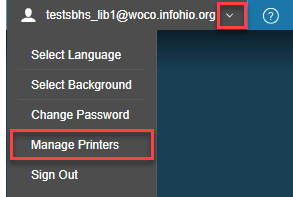
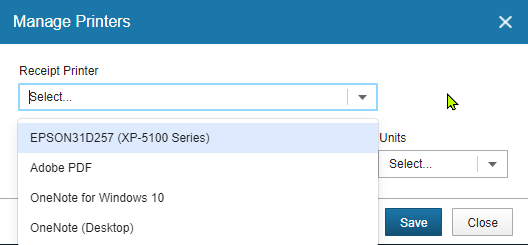
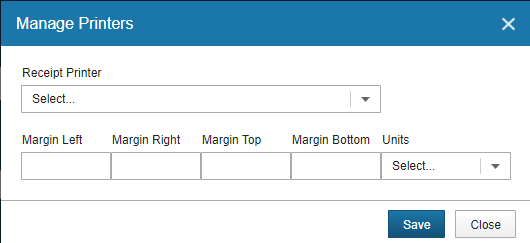
User Menu
With the User menu, you can customize account settings, like the displayed language and background.
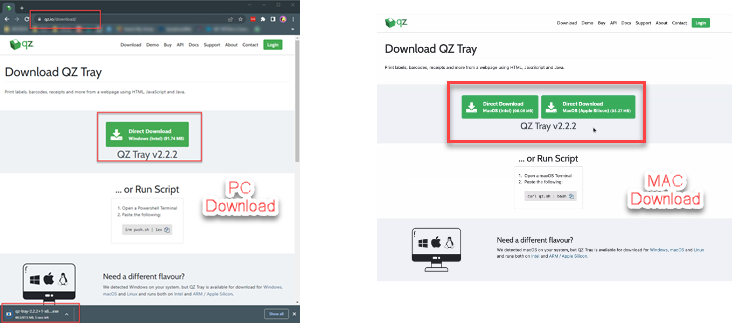
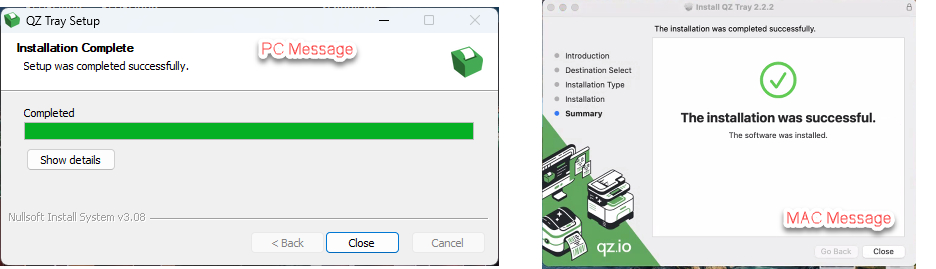
Silent Printing with QZ Tray
Downloading the QZ Tray application (https://qz.io/download/) will allow library staff to print without a print preview notification getting in the way. When library staff click Print to print a circulation receipt, a receipt will automatically be printed using the printer set as the default. This application can be downloaded for both PC and MAC computers.


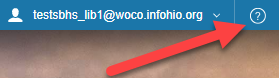
Help Menu
The Help menu is indicated by a question mark icon. Click the that icon to open BLUEcloud Central Help. From here you can find information and help on any BLUEcloud topic.
In addition to the Help menu, please see the BLUEcloud Pathway within INFOhio Campus or your INFOhio Provider with questions for further BLUEcloud support.
Click the Next button to learn how to find titles and copies using BLUEcloud Cataloging.

Fetch is avaiable to INFOhio automated schools. If you are an INFOhio school, please log in with your school username/password using the button at the top-left corner of this page.
For more information about Fetch, please visit the Fetch information page or contact INFOhio support at https://support.infohio.org.
