
Learning Objective
- Renew or edit the due date of an item.
BLUEcloud Circulation allows you to renew items that a patron has checked out. To renew items, navigate to the Patron Record of the patron who has the items checked out.
When renewing items, users have the option of selecting whether the renewed items were seen or unseen at the time of renewal. If a patron brings the physical item in to renew, you will select Renew as Seen. If they renew it without bringing the item in, select Renew as Not Seen. Items that are renewed through OPACs or self-check stations are automatically designated as renewed unseen.
- With the patron record pulled up, choose Items from the menu.
- Select the checkbox next to each item that you want to renew.
- Click the Renew button located in the upper right corner.
- A dialog displays, asking if you want to renew the items as seen or unseen. Click the appropriate button for your situation.
Note: If you are renewing more than one item, all the items selected must be renewed as either seen or unseen. You cannot renew some items as seen and some as unseen during a single bulk renewal. 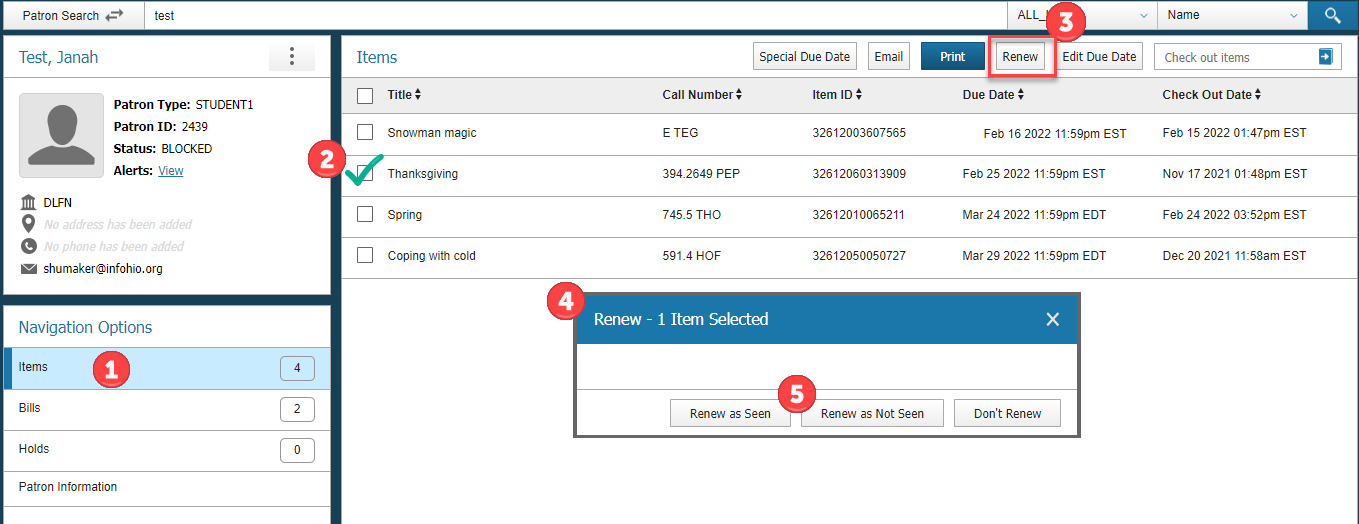
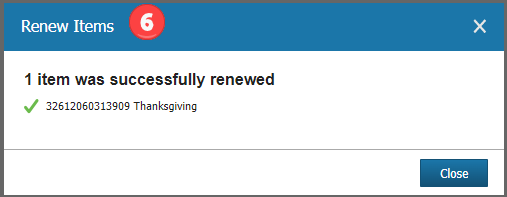
- A dialog appears, indicating whether or not the items have been successfully renewed and marking the progress if you have selected multiple items. If one or more renewals fail, the dialog gives the reasons for the failures. If any overrides are required, you are prompted to either acknowledge the override or enter the override code.
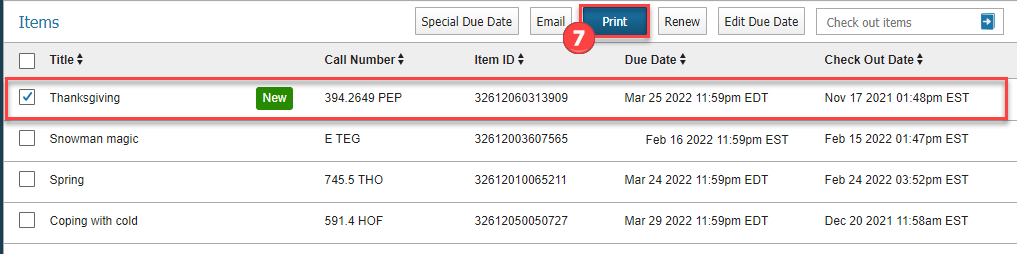
- If the patron requested a receipt, check the items renewed and then click the Print button. If you have set up Silent Printing in the How to Navigate BLUEcloud lesson, you can automatically print a receipt without print preview
Note: Depending on the browser you are using, you may be able to adjust the print scale of the receipt higher than 100% if the patron would have trouble reading the receipt at a lower scale.
Now it's your turn. Try the following steps to familiarize yourself with renewing items.
- Check out an item(s) to yourself or locate an item(s) that could be renewed.
- Select the box(es) next to the item(s) and click the "Renew" button.
- Choose from "Renew as Seen", "Renew as Not Seen", or "Don't Renew".
- A successful renewal will be indicated with a message and green checkmark.
- Check the item back in if you are finished.
An alternative to renewing an item is to modify or edit an item's due date. If an item has already been checked out, library staff can use the Edit Due Date button to extend or shorten the due date of an item without needing to renew it. To edit the due date for an item or items, navigate to the Patron Record of the patron who has the items checked out. 
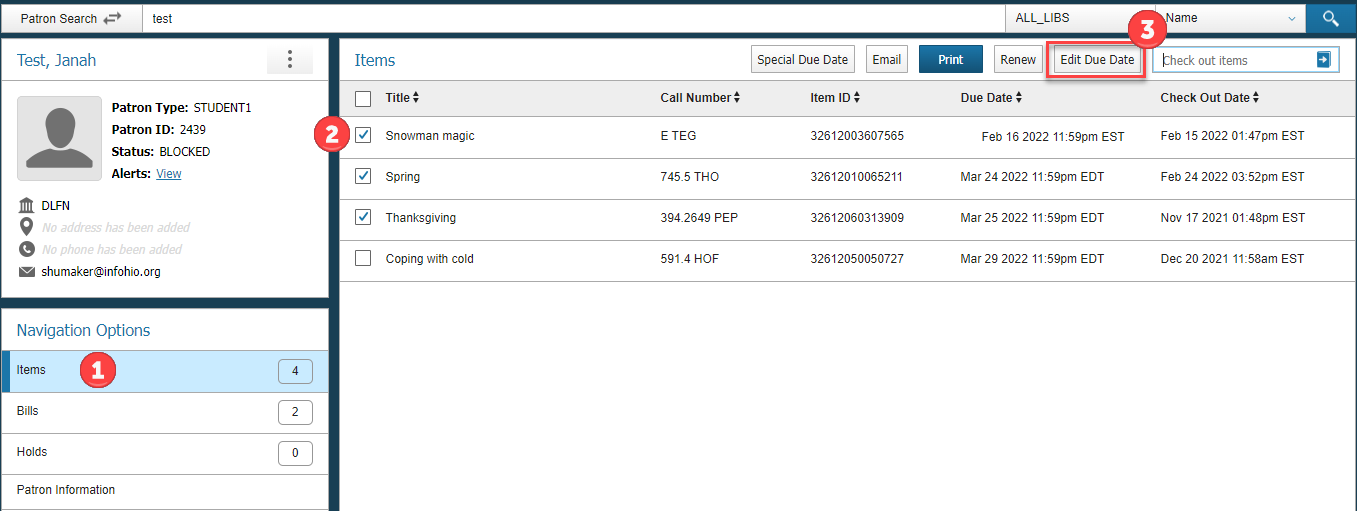
- With the patron record pulled up, choose Items from the menu.
- Select the checkbox next to each item to edit the due date.
- Click the Edit Due Date button located in the upper right corner.
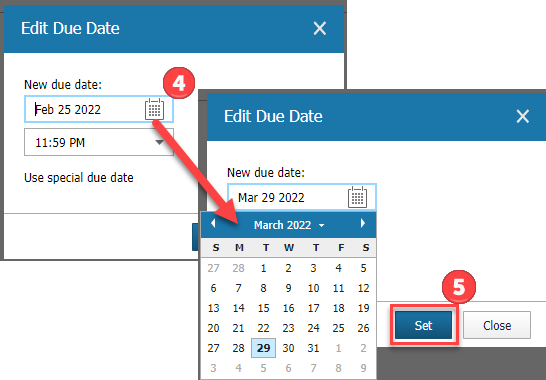
- Click the calendar to select the new due date.
- Click Set.
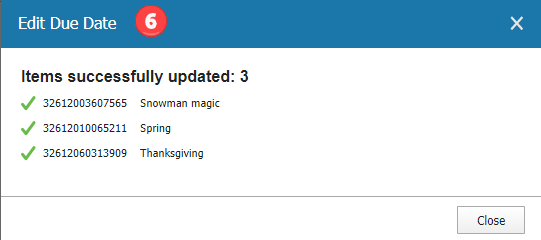
- A dialog appears, indicating whether or not the due dates have been successfully updated.
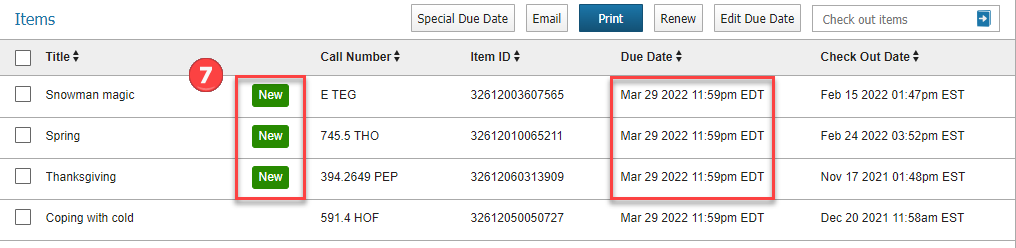
- Items with updated due dates will appear in the list of items with a "New" icon and the new due date will be reflected in the Due Date column.
Take a moment to try out Edit Due Date.
- Check out an item to yourself or locate an item that could be used to practice editing the due date.
- Select the box next to the item and click the "Edit Due Date" button.
- Change the date and time and when finished click "Set".
- A message will appear to let you know if the change was successful.
- Close the pop-up.
- Check the item back in if you are finished.
Once you have finished this lesson, click the Next button to move to the next lesson. If you have any questions, please contact your INFOhio Provider for help.

