
Learning Objectives
- Check an item out to a patron.
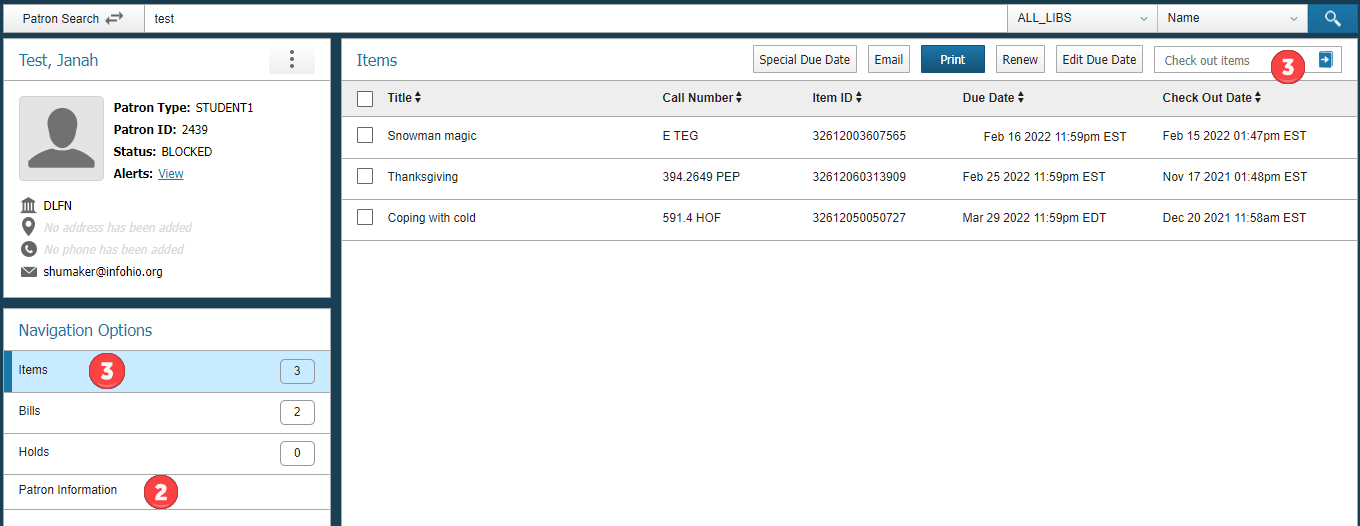
To check out an item, begin by retrieving the user record for the patron checking out the item.
- Make sure your Patron Search/Catalog Search toggle is on Patron Search.
- Choose the way you’d like to search (Name, Alt ID, User ID, etc.) and select a specific library.
- Enter patron information in the search box.
- Click the magnifying glass or use your Enter key to search.

If there is more than one result, you will be presented with a list.
- Click the Patron name to see brief information about their account.
- Click the words Patron Information to access the full patron record.
- Note the location of the Check Out items box. This is where you will check out an item.
To Check Out an item,
- Scan or type the barcode.
- Click the book icon with the arrow to check out the item or hit Enter on your keyboard.
- You will notice that the "Items" total will increase with each checkout.
- The item(s) you checked out will display in a list as you scan.
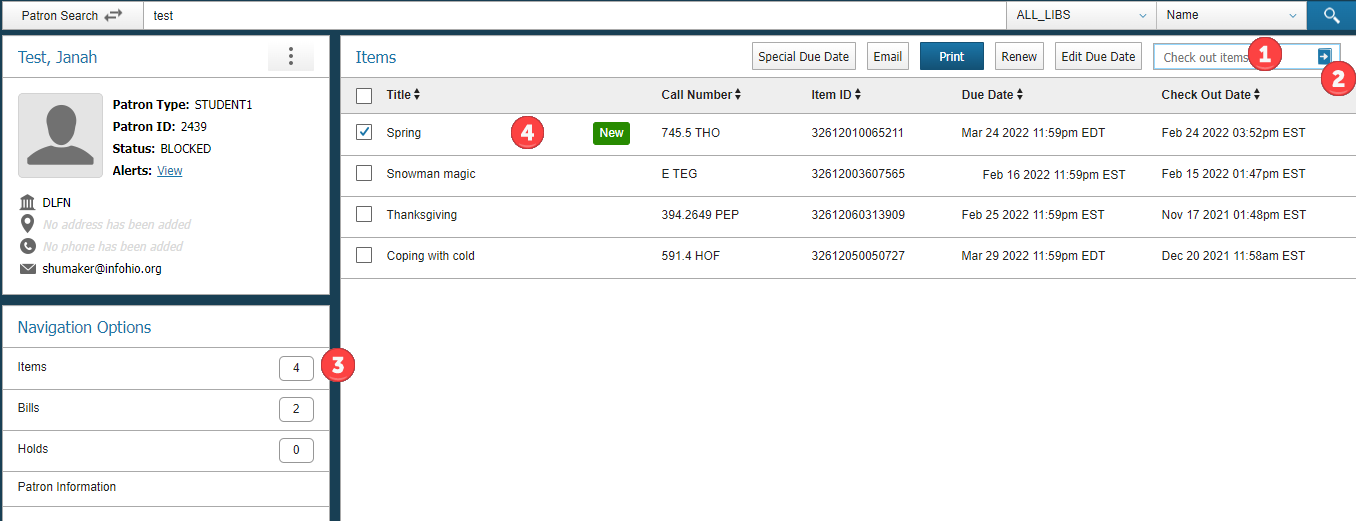
- The item(s) you just checked out are now listed under Items with "New" next to each one.
Take a moment to pause and practice checking an item out.
- Either locate an item for which you can scan the barcode or locate an item with a Catalog Search and copy the item barcode.
- Do a Patron Search for your personal account.
- Note any alerts on the account. Click Acknowledge to dismiss.
- Practice checking out an item to your account using the item you located in the first step.
- Once the item has been checked out, the item will display with a "New" tag and the number of items checked out will increase.
- Try a few other items and note any issues that arise.
- Don't check the item(s) back in just yet!
Questions? Please reach out to your INFOhio Provider for further help.
Special Due Date
When checking out an item, you can set a special due date before scanning the item(s). 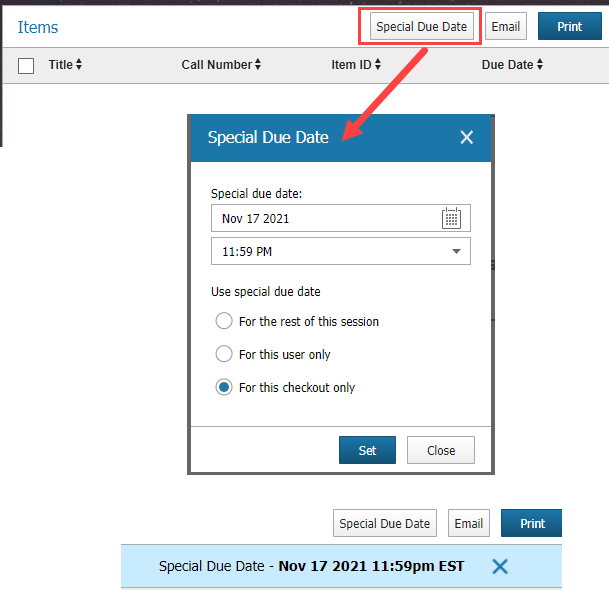
- Select the Special Due Date button.
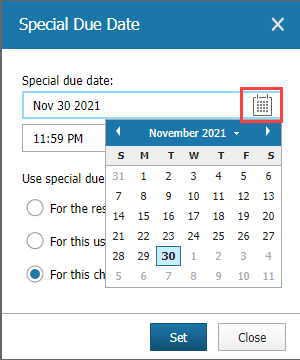
- Click the calendar to select a new due date.
- Use the drop-down menu to select a specific time of day, if needed.

- Choose from the available options for when to apply the special due date: for the rest of the session, for this user only, or for this checkout only. If you choose "rest of the session" as long as you stay within Circulation the special due date is retained. If you move between Circulation and another product like Cataloging, the special due date will need to be added again.
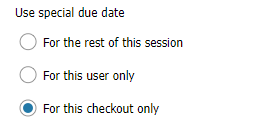
- Click Set.
- The special due date will be displayed in blue above the items checked out to a user. Click the X to remove the special due date.

Permitting Checkout of a Checked Out Item
If a user tries to check out an item, but the item is showing that it is currently checked out to another user, BLUEcloud Circulation will allow the user to check out the item without leaving the check out screen.
- Pull up the user's record,
- Scan the checked out item barcode in the Check Out Items box.
- A pop-up will appear letting you know the item is already checked out and ask if you want to continue with checkout.
- Click Continue if you would like to check the item out to the new user or click Cancel if you would like to investigate further.
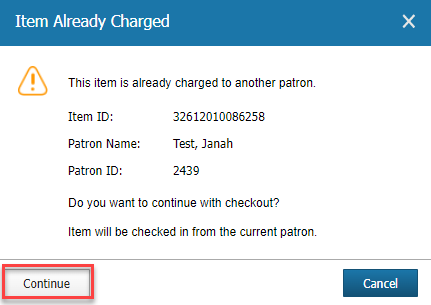
BLUEcloud will follow the selected option in Global Configuration policies for charging of an already-checked-out item. If you have questions about this setting and how it might affect check out at your library, please reach out to the Library Support Staff at your ITC for further help.
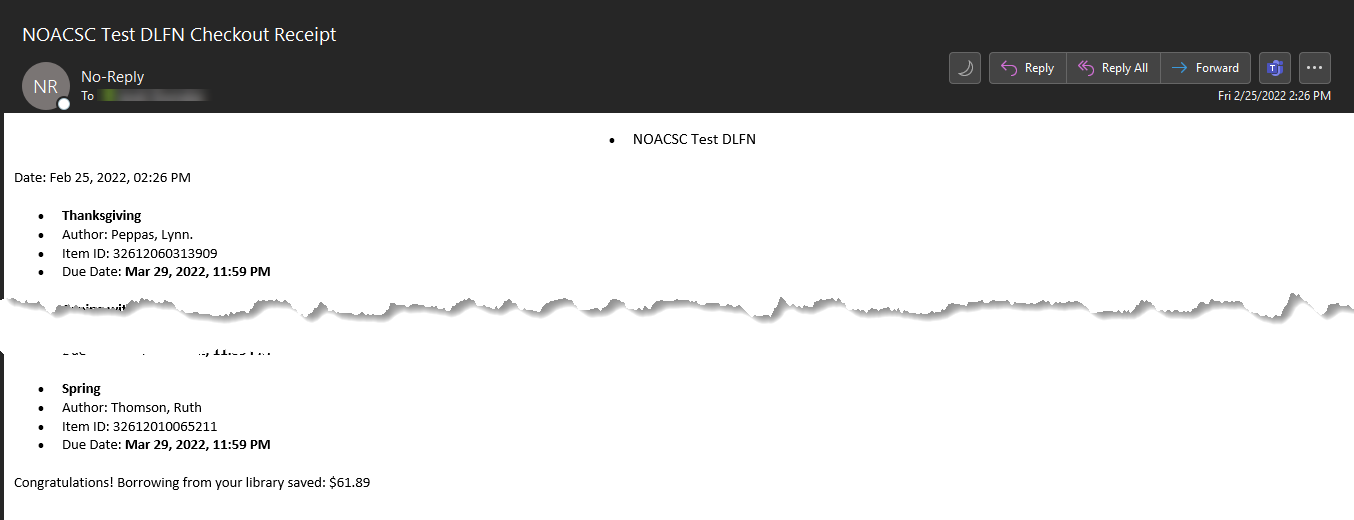
Emailing Check Out Receipts
BLUEcloud Circulation can email receipts to your users if there are email addresses attached to their account. You can find a user's email address by looking at the patron card in BLUEcloud Circulation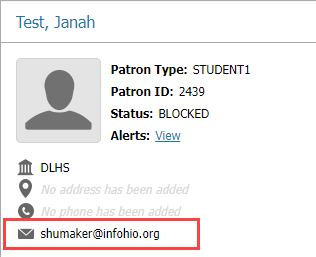 or within Patron Information, under the Contact tab.
Once a user has finished checking items out, or if they wish to have a list of their current checkouts, use the email option available within the Items screen. 
- Select All or check the box next to the item(s) that should be listed on the email receipt.
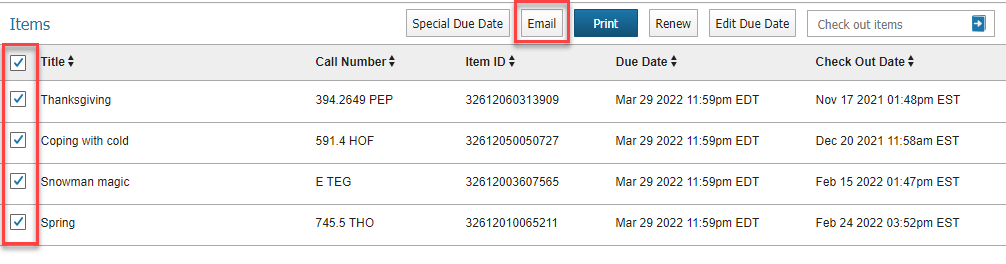
- Click the Email button.
- The system will confirm the email has been sent. The email will be sent to the email address(es) listed on the user's account.

- The user will receive an email with the information selected. Note that any replies to the email should go to the librarian, not as a reply to the email message itself.
If you have any questions about checking out an item to a patron, please contact your INFOhio Provider for further help.

