You can add, edit, or delete bibliographic records through BLUEcloud Cataloging. Additionally, you can import records into your catalog directly from a Z39.50 source or use those same sources to build up existing records with Smart Search.
The Z39.50 protocol searches for matching records in these remote catalogs: OCLC WorldCat, Library of Congress, INFOhio Catalog, and BLUEcloud MARC. We will refer to matched records from these sources as the Z39.50 record.
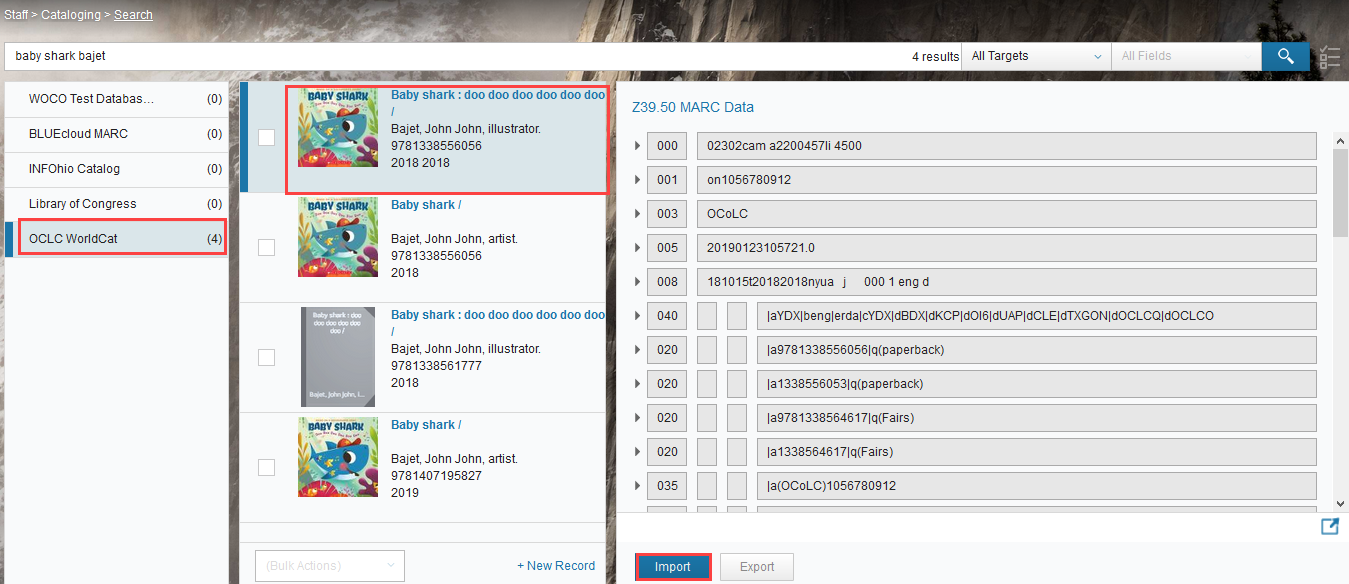
Search for a title from a Z39.50 target (BLUEcloud MARC, INFOhio Catalog, Library of Congress, and/or OCLC WorldCat databases).
From the main cataloging page, do a search using ALL Targets or pick a specific target mentioned above. Click the magnifying glass to search.
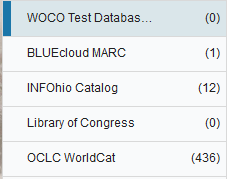
From the list of results, select a target on the left to narrow your search and locate a record for importing. Be sure to select a target with records available.
Once you have located a title you would like to import, click the item to show the bibliographic information.
Once you have determined that the record is a match, click Import.
When selecting a record, keep in mind:
A record must match your item’s title, author, and Physical Description (within a few pages).
Get as close as possible to the ISBN and Publication info as you can.
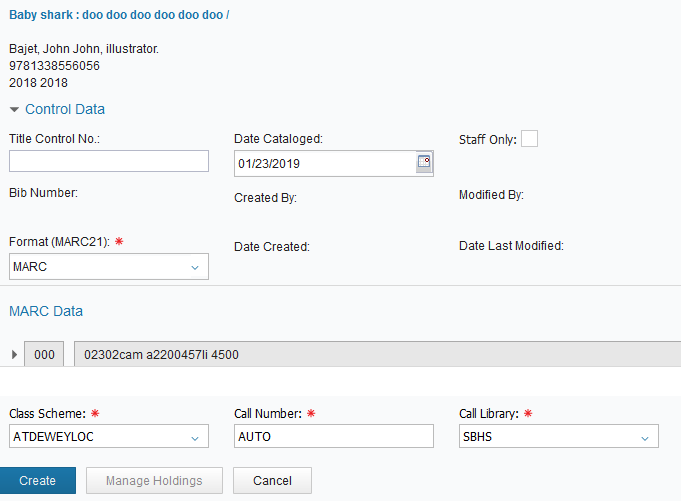
Fill in the needed information and click Create.
Title Control No.: This will populate once you save.
Date Cataloged: Use the calendar to enter the date.
Staff Only: Select if only Staff should see the record.
Format (MARC21): MARC or MARC Monograph
Class Scheme: Select ATDEWEYLOC.
Call Number: Enter AUTO for a system-generated call number that you will change in later steps.
Call Library: Enter your library code.
Once you’ve clicked Create, you can make more changes to the bib record if you would like.
Be sure to click Save if any changes are made.
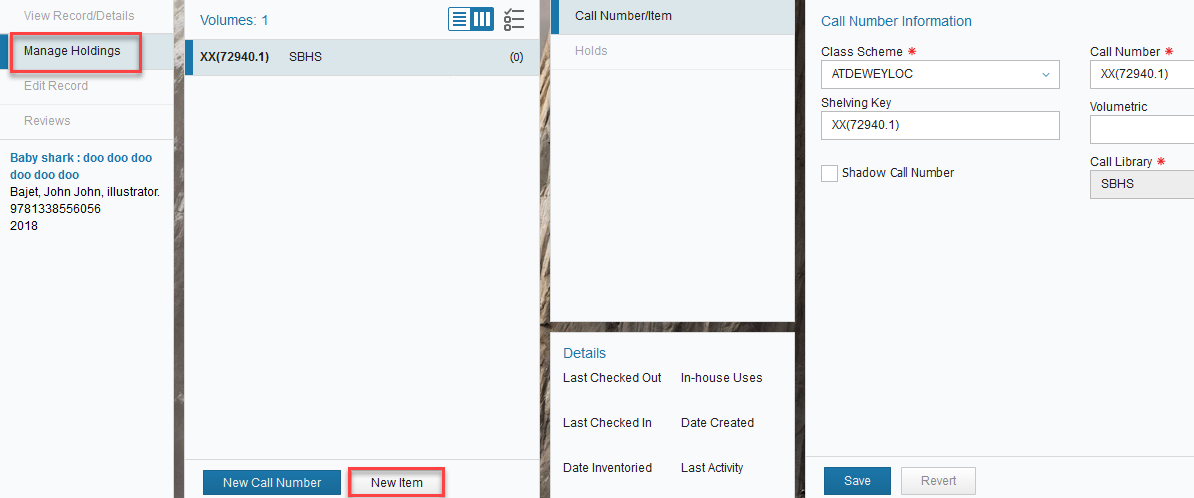
If you would like to add items, click Manage Holdings and you will be able to change the call number, add or change item information, and add items.
Always remember to add an item first before attempting to change the call number.
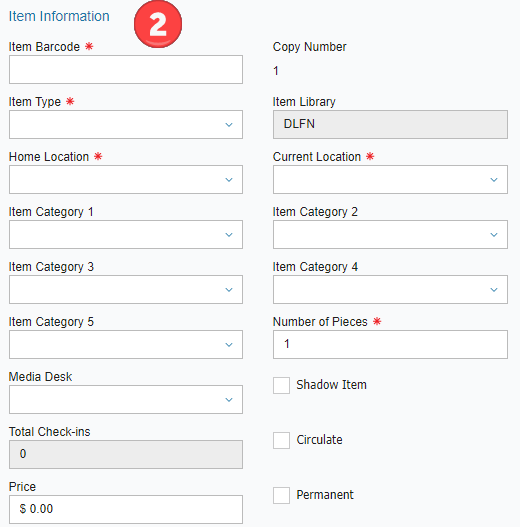
Add any of the Item Categories 1-5 as needed. (see below for a summary of these categories)
Shadow Item - If this item should be hidden in the online catalog, check this box.
Circulate - Check the box next to Circulate to ensure items are able to circulate to patrons. This box must be checked for items to circulate.
Permanent - Check the box next to Permanent if this item is a permanent part of the library's collection.
Price - Add an item price for collection development purposes, as well as billing for a lost item.
Item Notes - A Circnote, Public, or Staff note can be added. Please note a circnote will appear when the item circulates. A Public note will show in the online catalog. A Staff note will be displayed to library staff using the library software.
Click Create to Save or Revert to clear any changes.
Now, change the call number to its correct form. If you try to do this before you have created an item with a barcode, you will get an error.
Add more items if needed.
When finished cataloging, please see the Printing Barcodes and Spine Labels lesson (coming soon!) in the Introduction to Cataloging class for help on Printing Barcodes and Spine Labels for your new items.
Note: The Item Category headings are not customized at this time so please reference the information below in order to fill out those fields.
Item Category 1 = Material Type
Item Category 2 = Finding Source
Item Category 3 = Curricular Area
Item Category 4 = Grade Level
Item Category 5 = Genre
Pause and practice importing a bibliographic record on your own.
Perform a search using All Targets and locate an item that has not been cataloged in your district. (Find a record to import from one of the available Z39.50 sources: BLUEcloud MARC, INFOhio Catalog, Library of Congress, or OCLC WorldCat.)
Click the title to select a record and view the bibliographic information (Z39.50 MARC Data).
Verify the record matches the item you would like to catalog.
Import the record by clicking Import.
Enter item data as needed as indicated by a red asterisk.
Be sure to remember to use AUTO initially when adding a call number. It will be changed later, once you've added an item.
Click Create.
To add items, click Manage Holdings to add items and change item information.
Click Save when you are finished adding item information.
If you have any questions as you work through these exercises, please contact your INFOhio Provider for help or post your questions in the BLUEcloud Library Services Open Space group.
Click the Next button to move to the next lesson, Original Cataloging with Templates. If you have any questions, please contact your INFOhio Provider for help.